Hi in this tutorial we learn how we can save money using 2 colors printing process and how to prepare that and send the PDF format to our printer so
download This CDR file and let’s start
==>
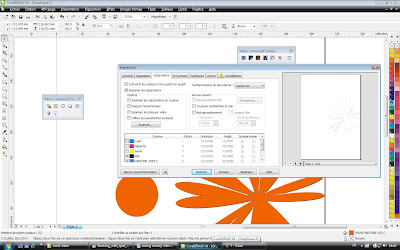
When you open the document you will see that I’ve use just 2 colors blue and orange but there is more than 2 colors used in this document to make you sure Click on color Docker Window , lock and chose CMYK color mode (CMYK is The process for industrial multicolor print).. Select the blue shape and you will see that there is more than one color to create this blue (C71, M40, Y0, K0), now select the orange and you’ll find (C0, M80, Y96, K0)
 So how we can change all this colors to 2 colors print process and save the money?
First click on the printer icon we will use its to learn more about color, click on separations icon turn on the print separation and print separation in color and click the print preview you see the printed plates.. now click cancel
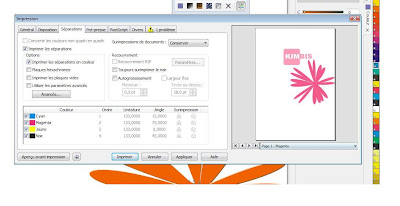
We’re not going to chose that because we’re looking for 2 colors print process so let’s start
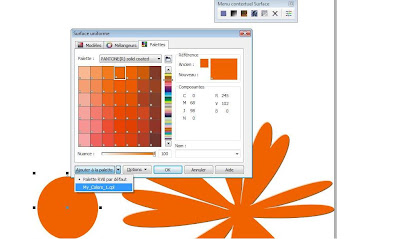
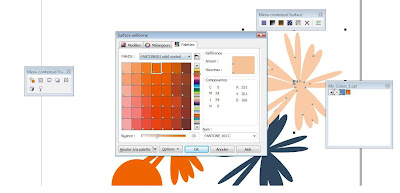
First we need to covert the color and we will need the pantone solid coated and color draw will convert the color.. So select the blue shape and press Shift+F11

You see that that CorelDraw have automatically chose a color that it believes it is close to the original color.. Press OK
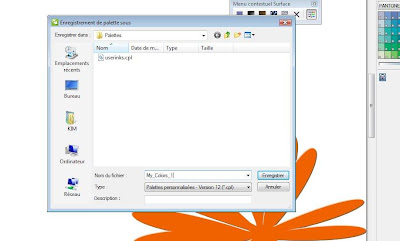
Take this… you can make your own palette color in color draw x 4
So select the blue shape Window>Color palettes>Create a palette from select
Name it My_Colors_1 and press save
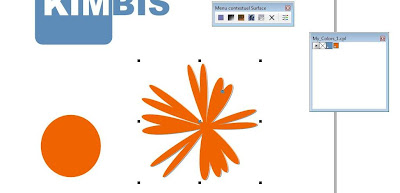
 Now let’s move to the orange circle do same thing, press Shift+F11 ,rather than click ok chose add to My_Colors_1 palette now click add to palette and then ok
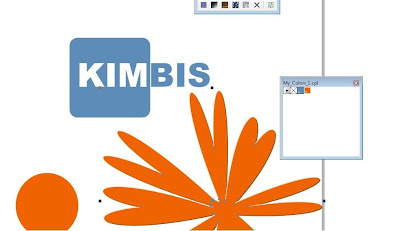
Now we have 2 colors we intend to use
Now select the orange flow and chose the orange from your new color palette
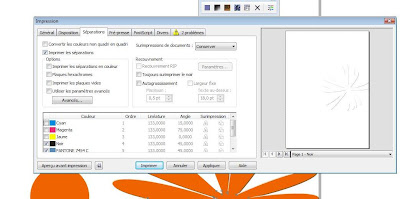
Now Click on the printer Icon to see how many Colors we got
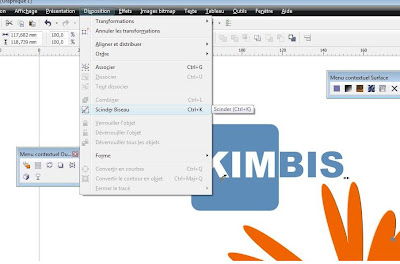
We that Cyan Magenta and yellow had been removed , and we got our two colors ,Ooooooooops there is Black ..We will where it comes from click cancel and back two your space work zoom the flower... Oh it’s the bevel effect. And what we’re going to find her that the bevel effect has add color to our flower and we need the break the bevel effect apart
Go Arrange>Break Bevel Apart
Right click and all ungroup
Now we got 4 shapes remove the grey one.
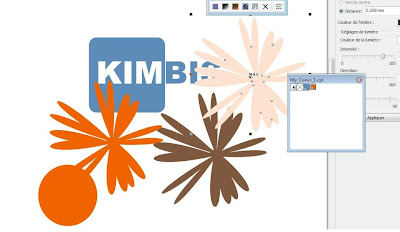
Now select the brown shapes and apply the blue color from our palette

Now select pink shape and apply orange color from our palette
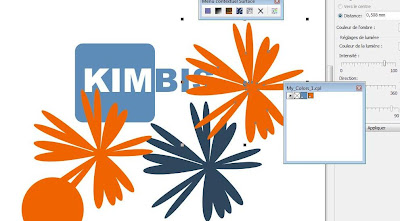
Here a very useful trick in CorelDraw x4 we can make the orange looks like the original pink using the tint just press Shift+F11 and reduce the tint
As you see we can create additional colors with tint
Now arrange the shapes and you got your bevel effect using our 2 colors
Now let’s check out our colors. Click on printer icon and …………….Voila..!!! We got just our two pantone colors.
What we have done is creating successfully a print based on 2 colors
I hope you have enjoyed this tutorial...KIMBIS


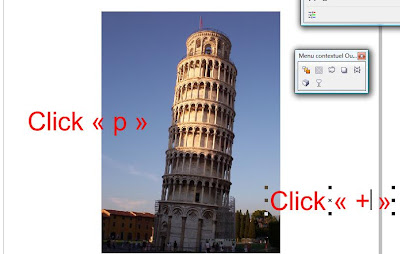
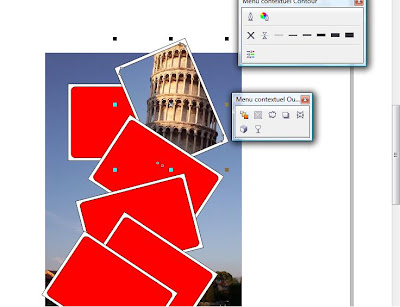
 now open the advanced outline palette and choose the folowing parametters
 now go to menu dispotion > convert outline to curve
 Now select the new converted outline press + in numpad to duplicate it and with the selected dulicate press one the left arow and one the down arrow to move it one pixel
 Don't forget the comments